

0
Owner's of the Tripp Lite Switch NETDIRECTOR gave it a score of 0 out of 5. Here's how the scores stacked up:

48
LDAP Configuration — Active Directory (c ontinue d)
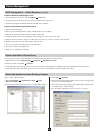
Create a Start Menu Shortcut Entry
Extend and Update the Active Directory Schema
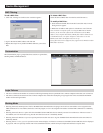
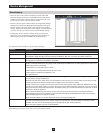
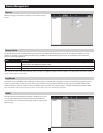
Device Management
Install the Windows 2003 Support Tools
1. On your Windows Server CD, open the Support Tools folder.
2. In the right panel of the dialog box that comes up, double click SupTools.msi.
3. Follow along with the Installation Wizard to complete the procedure.
Install the Active Directory Schema Snap-in
1. Open a Command Prompt.
2. Key in regsvr32 schmmgmt.dll to register schmmgmt.dll on your computer.
3. Open the Start menu. Click Run and key in mmc /a. Click OK.
4. On the File menu of the screen that appears, click Add/Remove Snap-in, then click Add.
5. Under Available Standalone Snap-ins, double click Active Directory Schema, click Close and click OK.
6. On the screen you are in, open the File menu and click Save.
7. For Save in, specify the C:\Windows\system32 directory.
8. For File name, key in schmmgmt.msc.
9. Click Save to complete the procedure.
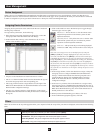
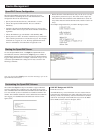
To create a shortcut entry on the Start Menu for the Active Directory Schema, do the following:
1. Right click Start;select:Open all Users Programs Administrative Tools.
2. On the File menu, select New Shortcut
3. In the dialog box that comes up, browse to or key in the path to schmmgmt.msc (C:\Windows\system32\schmmgmt.msc) and click Next.
4. In the dialog box that comes up, key in Active Directory Schema as the name for the shortcut, then click Finish.
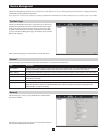
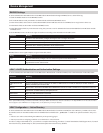
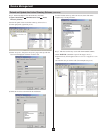
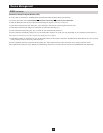
Step 1 - Create a New Attribute:
a) Open Control Panel Administrative Tools Active
Directory Schema.
b) In the left panel of the screen that comes up, right-click Attributes:
c) Select New Attribute.
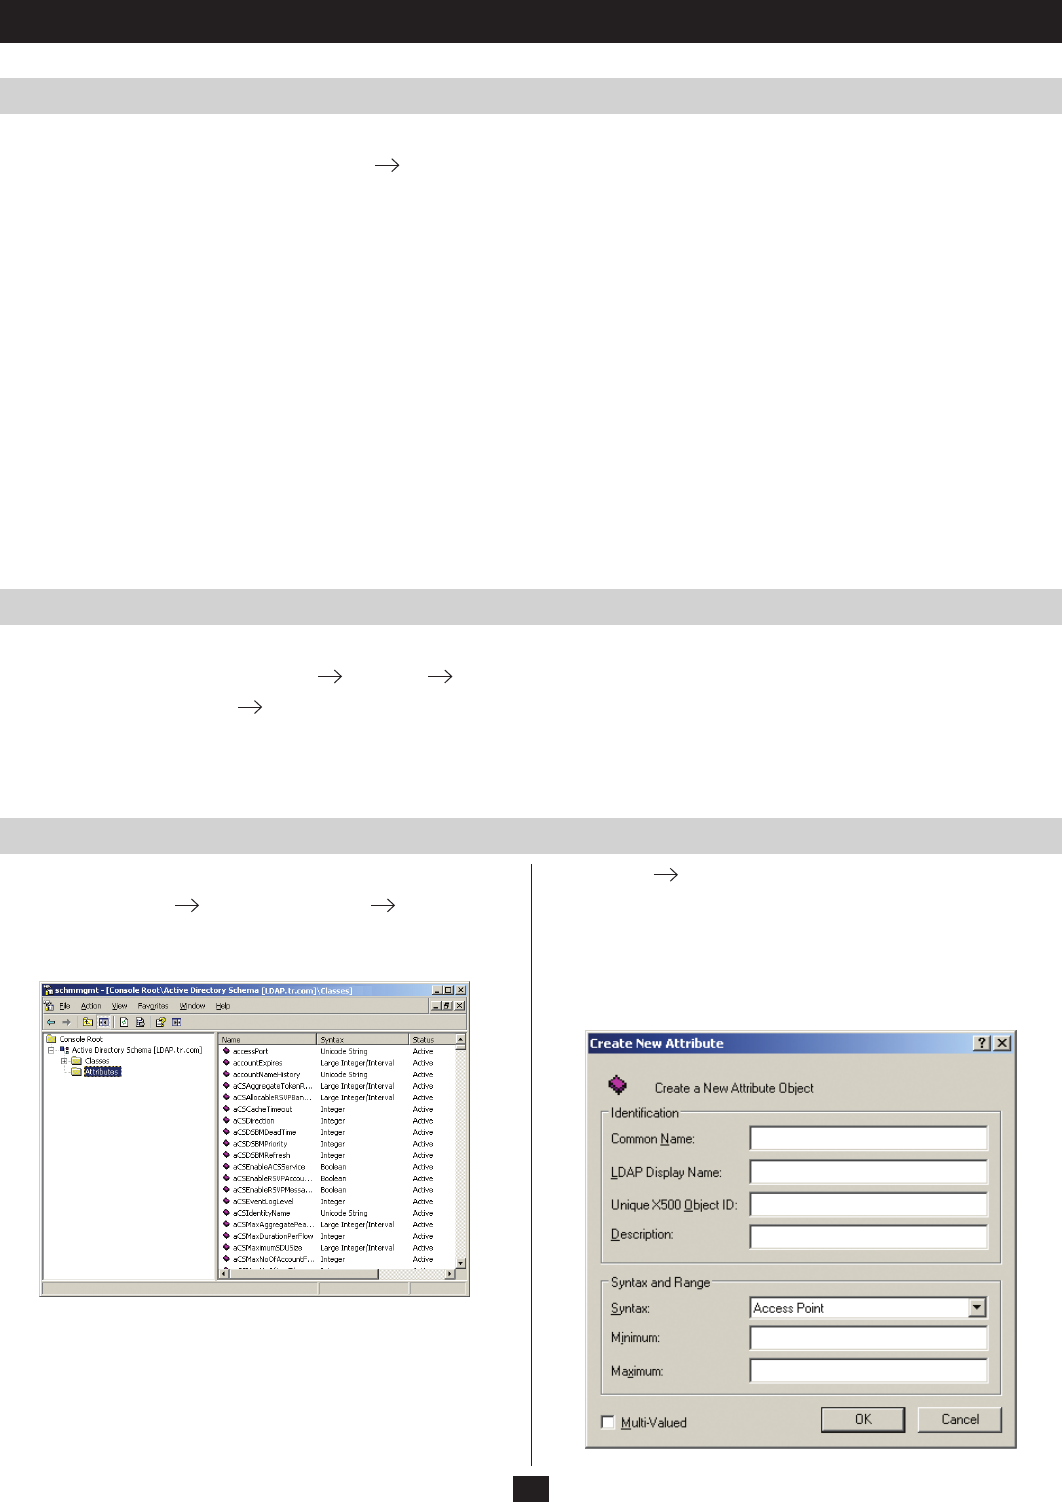
d) In the warning message that appears, click Continue to bring up the
Create New Attribute dialog box.
e) Fill in the dialog box according to the example below and click OK
to complete step 1 of the procedure.
Note: The Unique X500 Object ID uses periods, not commas.


Find Your Products By Category
- Home Audio
- Computer Equipment
- Photography
- TV and Video
- Household Appliance
- Communications
- Car Audio and Video
- Automotive
- Cell Phone
- Portable Media
- Kitchen Appliance
- Fitness & Sports
- Lawn and Garden
- Musical Instruments & Equipment
- Power Tools
- Personal Care
- Marine Equipment
- Video Game
- Baby
- Laundry Appliance
- Outdoor Cooking
Please Login
