

0
Owner's of the Tripp Lite Switch NETDIRECTOR gave it a score of 0 out of 5. Here's how the scores stacked up:


37
User Management
Groups – Creating Groups (continued)
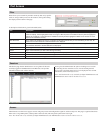
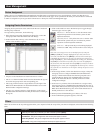
Groups – Modifying Groups
Groups – Deleting Groups
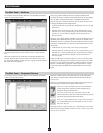
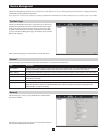
Assigning Users to Groups
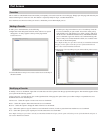
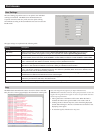
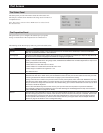
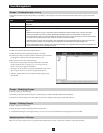
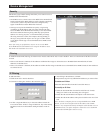
3. Enter the information for the Group that you are adding. A description of each of the fields in the Group notebook tab is given in the table
below:
Field Description
Group Name Enter in a name for the Group you are adding here. The Group name can have a minimum of 6 and a maximum of 16
characters.
Description Enter in any additional information about the group you are adding here.
Permissions Check the box of each permission that you want the group to have. A description of each of the permissions is listed
below:
• Windows Client allows a group to access the KVM via AP WIndows Client software. This or the AP Java Client
software is needed in the event the Super Administrator disables access to the KVM switch via web browser.
• Java Client allows a group to access the KVM via both browser and non-browser versions of the Java Client software.
If a group does not have access to Java, it will not be able to connect via browser.
• View Only limits a group to only being able to view the display of connected devices they are given access to. They
cannot control port access, nor can they input any keyboard or mouse signals to the devices they view.
• Force to Grayscale forces the group’s view of the remote display to be in grayscale. This can speed up keyboard and
mouse response time in low bandwidth situations.
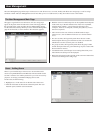
4. When your selections have been made click Save.
5. When the Operation Succeeded popup appears, click OK.
6. Click Group in the List panel to return to the main screen. The new
group appears in the list and in the main panel, as well.
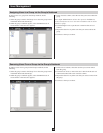
At this point you can do any of the following:
• AssignuserstothegroupbyselectingtheMembers tab in the
group’s notebook. (See Assigning Users to a Group from the
Group’s Notebook on page 39 for details)
• AssignportaccessrightsforagroupbyselectingtheDevices tab.
(See Assigning Device Permissions on page 40 for details)
• Addmoregroupsand/orusersandnishconguringthegroup
account later.
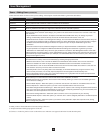
To modify a group, do the following:
1. Click the group’s name in the Group list or select the group’s name in the Main Panel and click Modify.
2. The same as when creating an account, make any necessary changes to the group account and click Save.
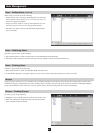
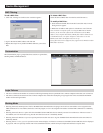
To delete a group do the following:
1. Select the group’s name in the main panel and click Delete.
2. A confirmation dialog box will appear asking if you are sure you want to delete the selected group account. Click OK.
Therearetwowaystoassignuserstoagroupandremovethemfromagroup;viatheUser’snotebookorGroup’snotebook.


Find Your Products By Category
- Home Audio
- Computer Equipment
- Photography
- TV and Video
- Household Appliance
- Communications
- Car Audio and Video
- Automotive
- Cell Phone
- Portable Media
- Kitchen Appliance
- Fitness & Sports
- Lawn and Garden
- Musical Instruments & Equipment
- Power Tools
- Personal Care
- Marine Equipment
- Video Game
- Baby
- Laundry Appliance
- Outdoor Cooking
Please Login
