
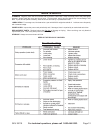
3.3
Owner's of the Harbor Freight Tools Drill 38119 gave it a score of 3.3 out of 5. Here's how the scores stacked up:
Page 8SKU 38119 For technical questions, please call 1-800-444-3353.
SETTINGS AND ADJUSTMENTS
Before adjustments are made, ensure that the machine is SWITCHED OFF AND UNPLUGGED. Also
make sure all locking handles and securing screws are FULLY TIGHTENED when adjustments are
completed.
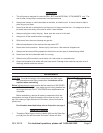
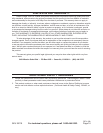
TO ADJUST THE TABLE
The table is capable of being raised, lowered, or swiveled about
the column by:
Slackening off the table support locking handle (A), adjusting ac-1.
cordingly, and re-tightening the handle; or,
It may also be tilted by loosening the Set Screw (B), tilting to the 2.
required position, (up to 45 degrees in either direction) and re-
tightening the Set Screw.
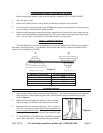
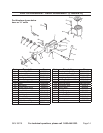
SETTING THE REQUIRED ANGLE
A Bevel Scale (C), provided on the table mounting, is measured 1.
in degrees to assist in setting the required angle. For all normal
operations the table should be set at 0° (see Figure 3).
To ensure the drill is entirely perpendicular to the table, insert a 2.
piece of straight round bar in the chuck, place a square on the
table and bring it up to the round bar. Adjust the table tilt if neces-
sary so that the table is correctly aligned.
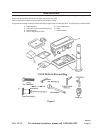
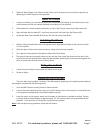
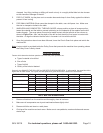
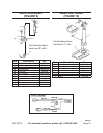
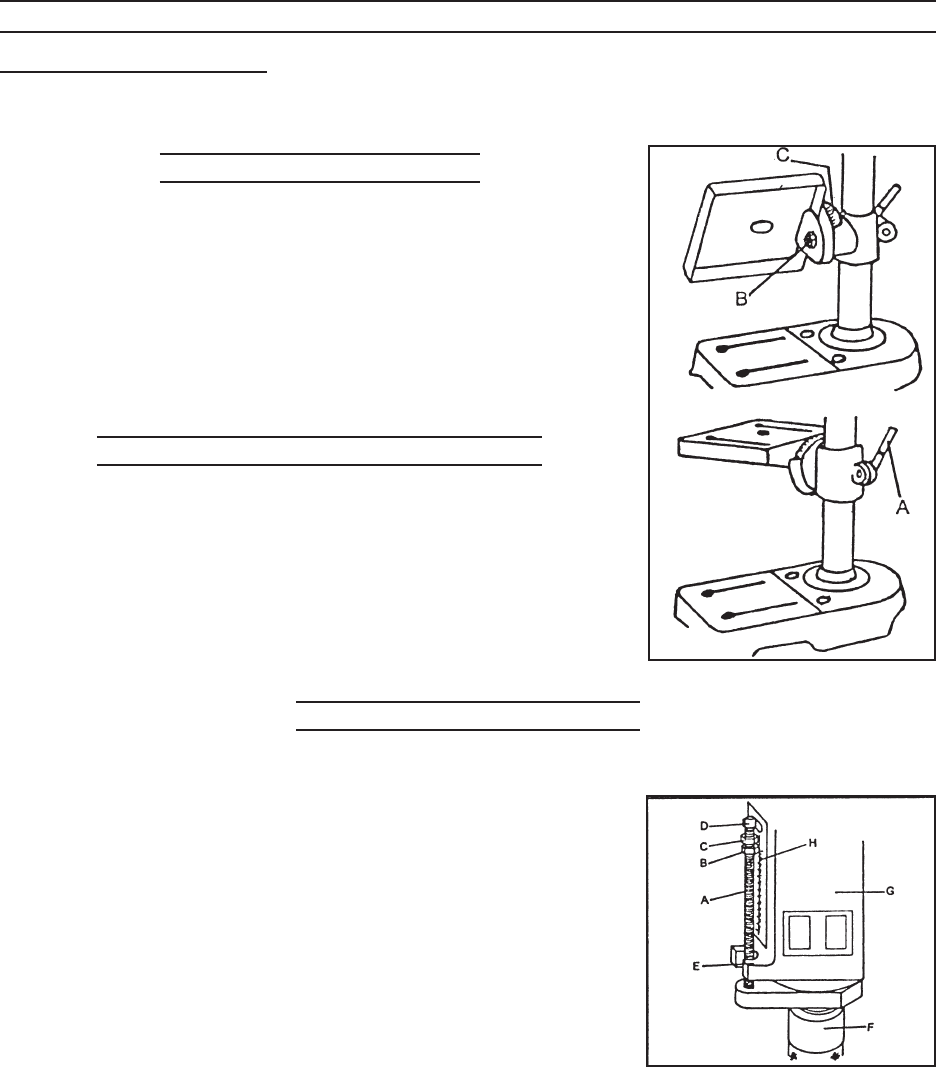
TO SET DRILLING DEPTH
Located on the left side of the drill head (G) is the Spindle Feed (or depth feed) adjuster assembly,
which allows the depth of the hole to be set. The procedure for setting the drilling depth is as follows (See
Figure 4):
Lower the Chuck (F) until the drill contacts the surface of the 1.
workpiece and hold that in position.
Screw down the adjuster nut (B) so that the gap between its un-2.
derside and face (E) is the depth of the hole required.
Screw down nut (C) and lock it against the adjuster nut (B).3.
The drill is now set to drill holes to your predetermined depth from
that particular start point (i.e., providing the surface of your workplace is
at and level, you may drill a series of holes, each to the same depth.
The scale (H) and pointer (D) can be used to drill one off, by lowering the chuck — as explained
above in “To Set Drilling Depth” section — until the drill contacts the work, setting the pointer (D) against
a set point on the scale (H), switching the drill ON and proceeding to drill to the required depth using the
scale (H) as a guide.
Figure 3
Figure 4


Find Your Products By Category
- Home Audio
- Computer Equipment
- Photography
- TV and Video
- Household Appliance
- Communications
- Car Audio and Video
- Automotive
- Cell Phone
- Portable Media
- Kitchen Appliance
- Fitness & Sports
- Lawn and Garden
- Musical Instruments & Equipment
- Power Tools
- Personal Care
- Marine Equipment
- Video Game
- Baby
- Laundry Appliance
- Outdoor Cooking
Please Login
