

0
Owner's of the Dacor Refrigerator EF36LNBSS gave it a score of 0 out of 5. Here's how the scores stacked up:
14
Installation Instructions
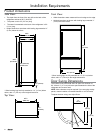
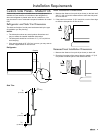
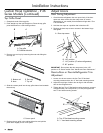
Install Anti-Tip Boards
IMPORTANT:
To avoid tipping during use, the solid soffit must be within 1”
(2.5 cm) maximum above the refrigerator. If the solid soffit
is higher than 1” (2.5 cm) or one is not available, then the
refrigerator must be braced.
It is recommended that board(s) be installed before the
refrigerator is installed.
Board(s) must be long enough to fully cover the width of the
compressor cover.
Locate the board(s) so the bottom surface(s) of the board(s) is
(are) 84” (213 cm) from the floor.
During installation, raise the refrigerator up so there is ¼” (6.35
mm) maximum between the top of the refrigerator and the
bottom of the anti-tip board(s). Do not crush the compressor
cover when raising the rear leveling legs.
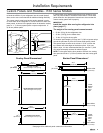
To Install Anti-tip Boards
Mark the stud locations on rear wall 80” to 90” (203 cm to 229 1.
cm) above floor.
Securely attach one or two 2” x 4” x 32” (5 cm x 10 cm x 81 2.
cm) boards to wall studs behind refrigerator. Use six #8 x 3”
(7.6 cm) (or longer) wood screws. The wood screws must be
screwed into the studs at least 1½” (3.8 cm). The board(s)
must overlap the compressor cover.
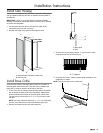
Connect the Water Supply
Read all directions before you begin.
IMPORTANT: If you turn the refrigerator on before the water line
is connected, turn the ice maker off.
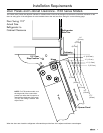
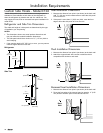
Style 1 - Shutoff Valve Connection
NOTE: If your water line connection does not look like Style 1,
see Style 2 - Copper Line Connection.
Unplug refrigerator or disconnect power supply.1.
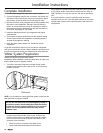
IMPORTANT: Before attaching the tubing to shutoff valve, flush
the main water supply line to remove particles and air in the water
line. Allow enough flow so that water becomes clear. Flushing
the water line may help avoid filters and/or water valves from
becoming clogged.
Remove the shipping tape from the gray, coiled water tubing 2.
on the rear of the refrigerator.
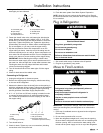
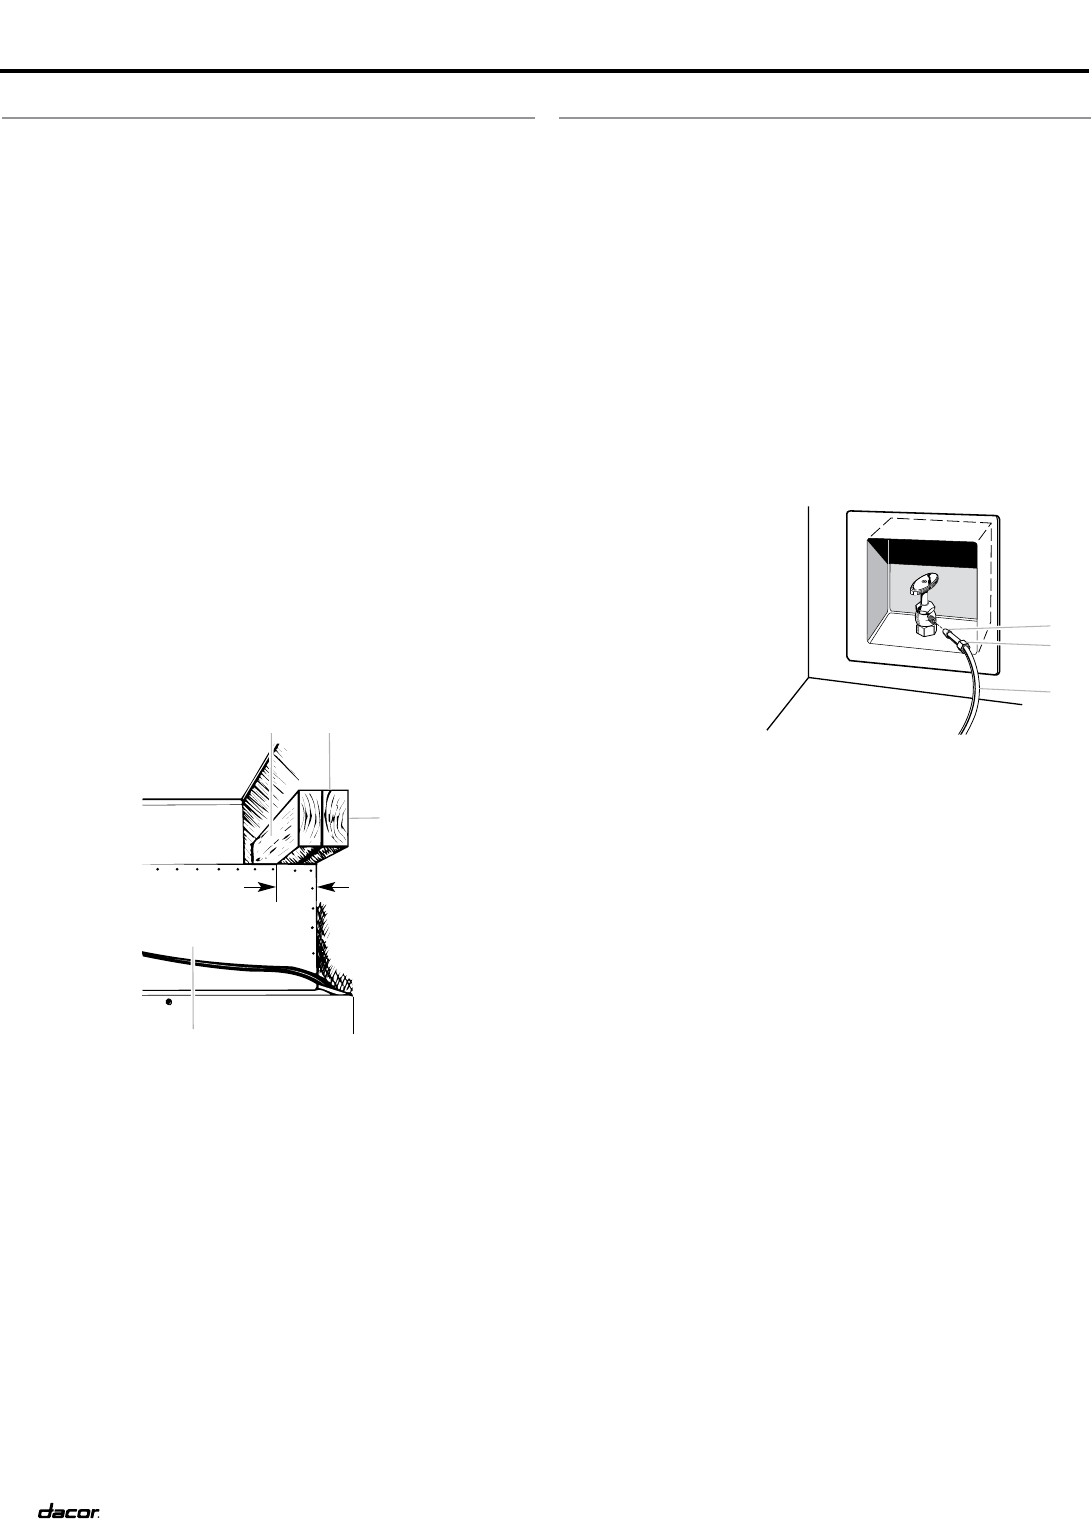
Thread the provided 3.
nut onto the shutoff
valve as shown.
Turn shutoff valve 4.
on.
Check for leaks. 5.
Tighten any nuts
or connections
(including
connections at the
valve) that leak.
Plug in the refrigerator or reconnect power.6.
Flush the water system. See 7. Water System Preparation.
NOTE: Allow 24 hours to produce the first batch of ice. Discard
the first three batches of ice produced. Allow 3 days to completely
fill ice container.
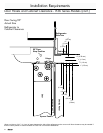
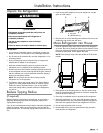
Style 2 - Copper Line Connection
Connecting to Water Line
NOTE: If existing water line meets the Water System
Requirements, see Connecting to Refrigerator.
Unplug refrigerator or disconnect power.1.
Turn off main water supply. Turn on nearest faucet long 2.
enough to clear line of water.
Locate a ½” to 1¼” (1.25 cm to 3.18 cm) vertical cold water 3.
pipe near the refrigerator.
IMPORTANT:
Make sure it is a cold water pipe.
Horizontal pipe will work, but drill on the top side of the pipe,
not the bottom. Doing so will help keep water away from the
drill and normal sediment from collecting in the valve.
Determine the length of copper tubing you need. Measure 4.
from the connection on the lower left rear of refrigerator to
the water pipe. Add 7 ft. (2.1 m) to allow for cleaning. Use ¼”
(6.35 mm) O.D. (outside diameter) copper tubing. Be sure both
ends of copper tubing are cut square.
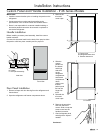
A. Center board
¹⁄
4
" (6.35 mm) max. above refrigerator
B. Two 2" x 4" x 32" (5 cm x 10 cm x 81 cm) boards
C. Attach to studs with six #8 x 3" (7.6 cm) screws
D. Compressor cover
BA
C
2" (5 cm)
D
A
B
C
A.Bulb
B.Nut
C.Water tubing


Find Your Products By Category
- Home Audio
- Computer Equipment
- Photography
- TV and Video
- Household Appliance
- Communications
- Car Audio and Video
- Automotive
- Cell Phone
- Portable Media
- Kitchen Appliance
- Fitness & Sports
- Lawn and Garden
- Musical Instruments & Equipment
- Power Tools
- Personal Care
- Marine Equipment
- Video Game
- Baby
- Laundry Appliance
- Outdoor Cooking
Please Login
